คู่มือการทำ Secondary: DS-RX1 non Cutting
ก่อนเริ่ม
- ติดตั้ง driver ของ DS-RX1 และสั่งพิมพ์จากเครื่องพิมพ์หลักได้แล้ว
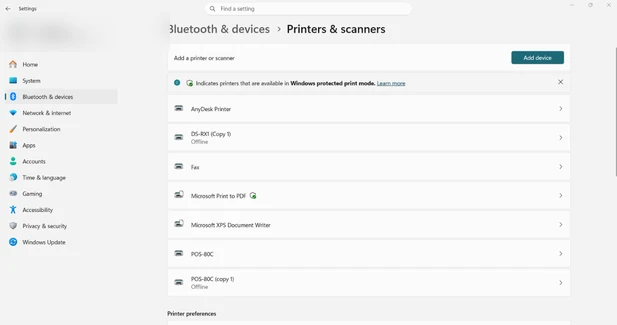
1. เปิดหน้า Printers & scanners
เปิด Settings → Bluetooth & devices → Printers & scanners แล้วกด Add device
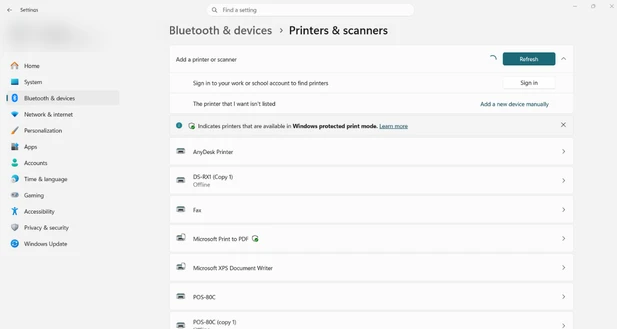
2. กด Add a new device manually
รอให้ Windows ค้นหาสักครู่ จะมีบรรทัด The printer that I want isn't listed ให้กด Add a new device manually
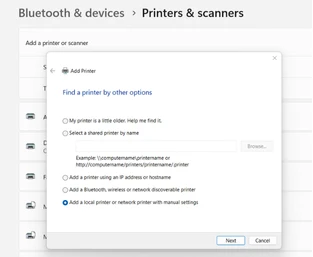
3. เลือกแบบตั้งค่าเอง
ในหน้า Find a printer by other options เลือก Add a local printer or network printer with manual settings แล้วกด Next
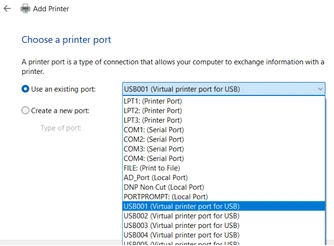
4. เลือก Port
ในหน้า Choose a printer port เลือก Use an existing port แล้วเลือกพอร์ตเดียวกับ DS-RX1 ตัวหลัก ส่วนใหญ่เป็น USB001 (Virtual printer port for USB) แล้วกด Next
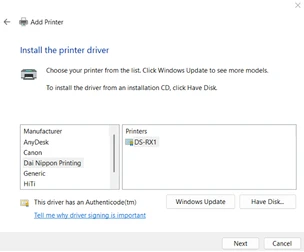
5. เลือก driver
ในหน้า Install the printer driver ช่อง Manufacturer เลือก Dai Nippon Printing ช่อง Printers เลือก DS-RX1 แล้วกด Next
6. ใช้ driver เดิม
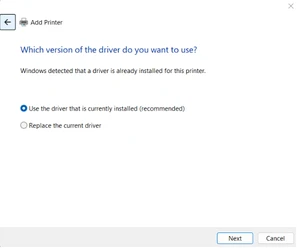
ในหน้า Which version of the driver do you want to use? เลือก Use the driver that is currently installed (recommended) แล้วกด Next
7. ตั้งชื่อเครื่องพิมพ์
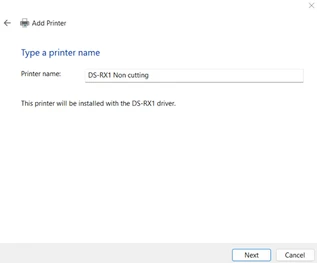
ในหน้า Type a printer name ช่อง Printer name ตั้งชื่อตามที่ใช้งาน เช่น DS-RX1 Non cutting แล้วกด Next
8. แชร์เครื่องพิมพ์
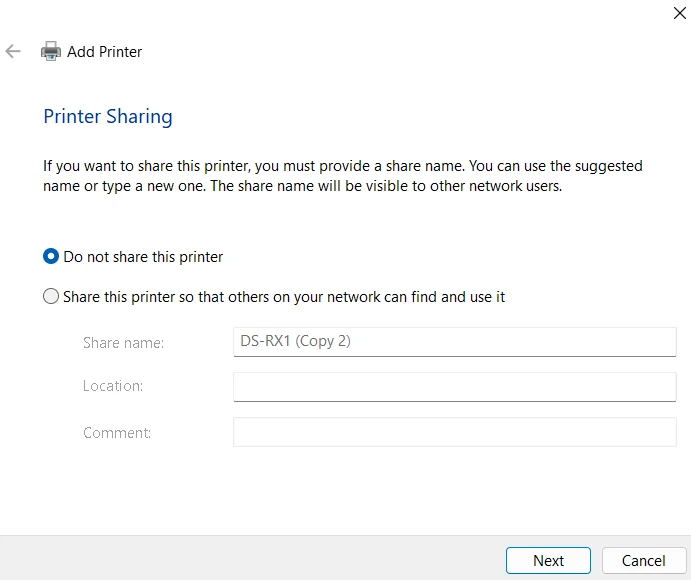
ในหน้า Printer Sharing เลือก Do not share this printer แล้วกด Next จากนั้นกด Finish
9. เลือก Secondary Print ในโปรแกรม 2TBooth
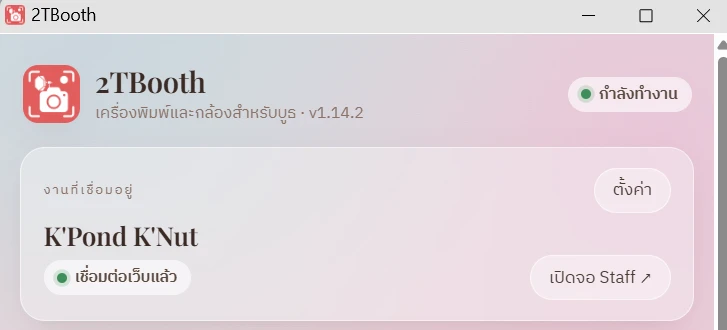
ในหน้าต่าง 2TBooth กด ตั้งค่า
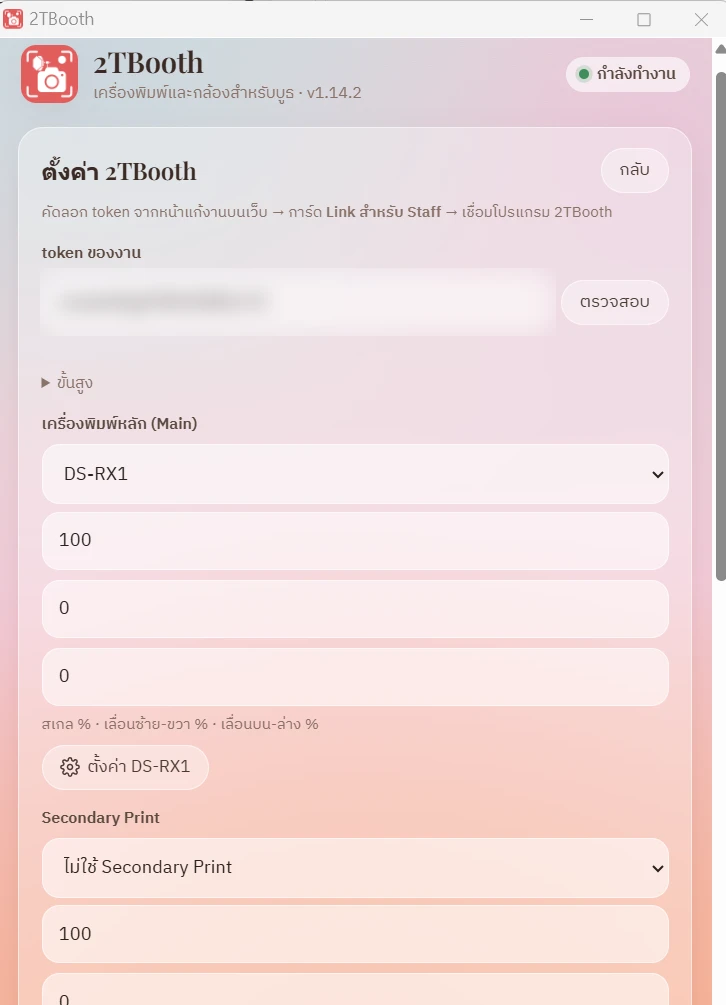
- ช่อง Secondary Print เลือก DS-RX1 Non cutting
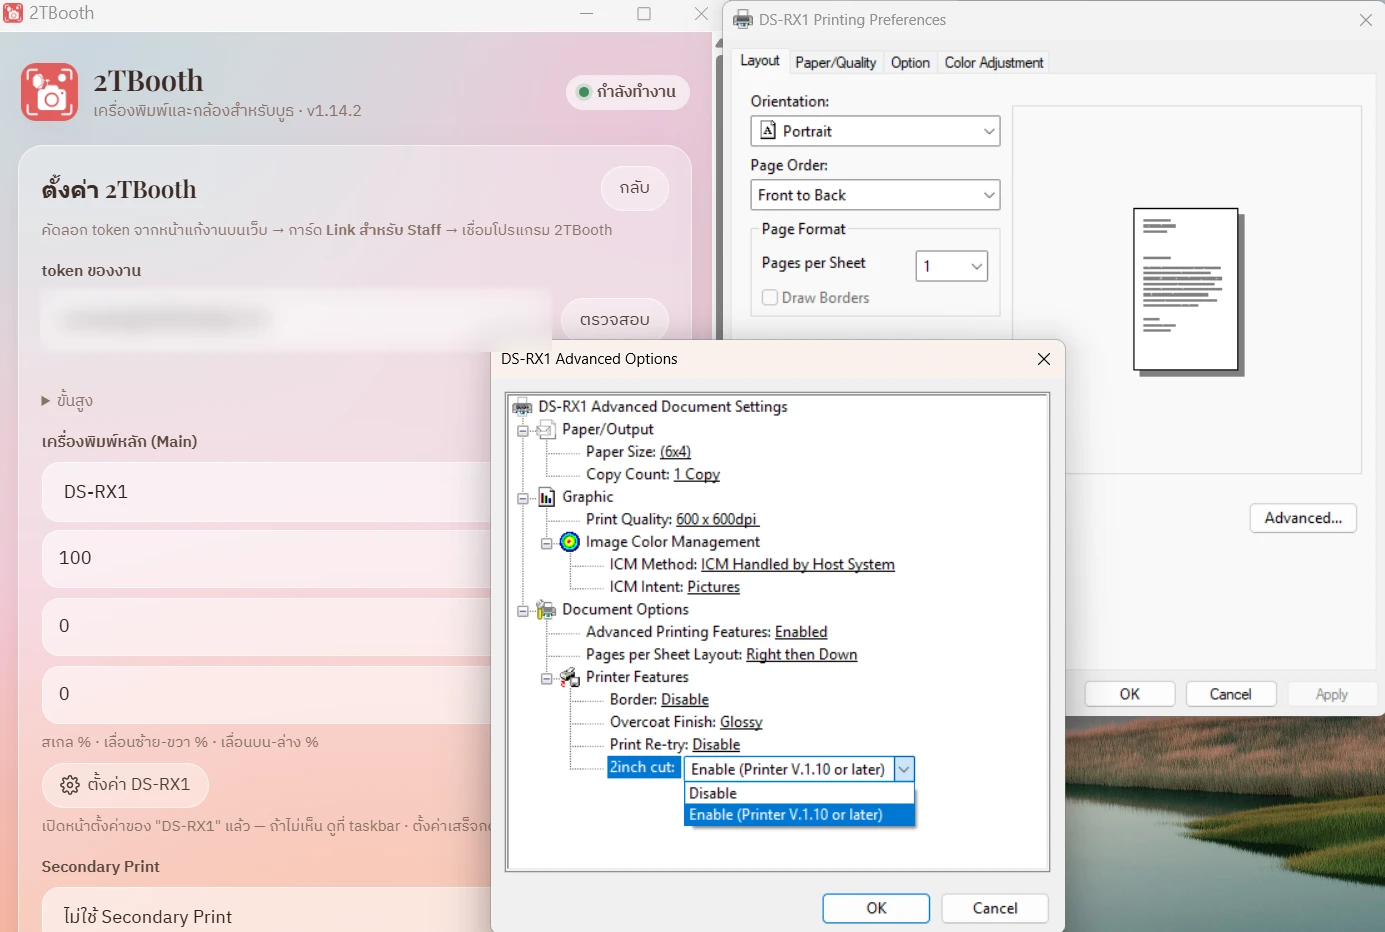
- กด ตั้งค่า DS-RX1 Non cutting จะเปิดหน้า Printing Preferences ของเครื่องนี้ → กด Advanced... → ใต้ Printer Features ตั้ง 2inch cut เป็น Disable และเช็ค Paper Size ให้ตรงกับเทมเพลต → กด OK → OK
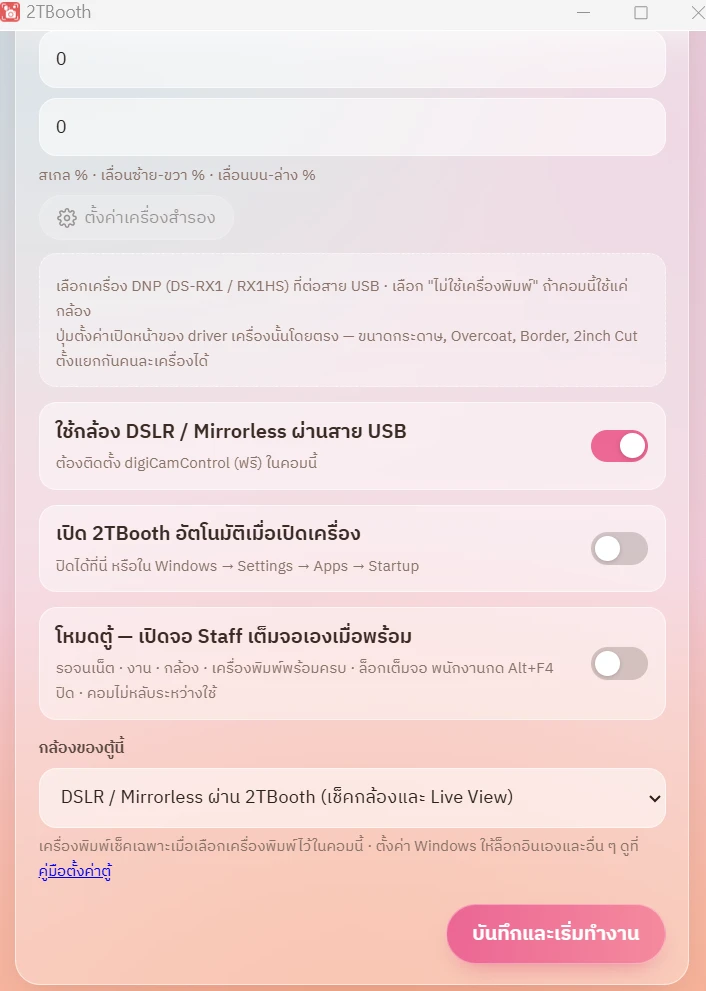
- กด บันทึกและเริ่มทำงาน
10. เปิด Secondary Print ที่เทมเพลต
บนเว็บ เปิดหน้าแก้งาน → เลือกเทมเพลตที่จะพิมพ์แบบไม่ตัด → เปิดสวิตช์ Secondary Print เป็น On เทมเพลตอื่นยังพิมพ์ออกเครื่องหลักตามเดิม
ข้อควรระวัง
- เสียบเครื่องพิมพ์ช่อง USB เดิมทุกครั้ง ถ้าย้ายช่อง Windows อาจสร้างเครื่องใหม่ เช่น DS-RX1 (Copy 1) พร้อมพอร์ตใหม่ แล้ว Secondary จะยังชี้พอร์ตเก่า
- ยอดกระดาษคงเหลือนับรวมเครื่องหลักกับ Secondary เพราะเป็นม้วนเดียวกัน